Gbiota beds make it simple to create healthy, living soil that grows “gut food” – vegetables rich in beneficial biology and minerals that support the gut–brain system.
I wrote this article to show how easy it is to make a basic Gbiota bed and turn ordinary soil and waste into high-quality growing media.
Anyone can do this using soil biology, organic waste, rock dust, and worms. Here I focus on a simple box system, but the same principles scale up to larger commercial beds. See more articles under the “Growing” section on the site.
Gbiota beds are not just a watering system to grow cabbages. They are designed to breed beneficial soil biology so plants act as natural prebiotics and probiotics for our gut.
To breed beneficial soil microbes (“good bugs”), you must feed them. They thrive on organic waste, manure, and a broad spectrum of minerals. Mycorrhizal fungi and worms are especially important for breaking down minerals and building long-term soil structure.
The Growing Box, Pipes and Soil Dam
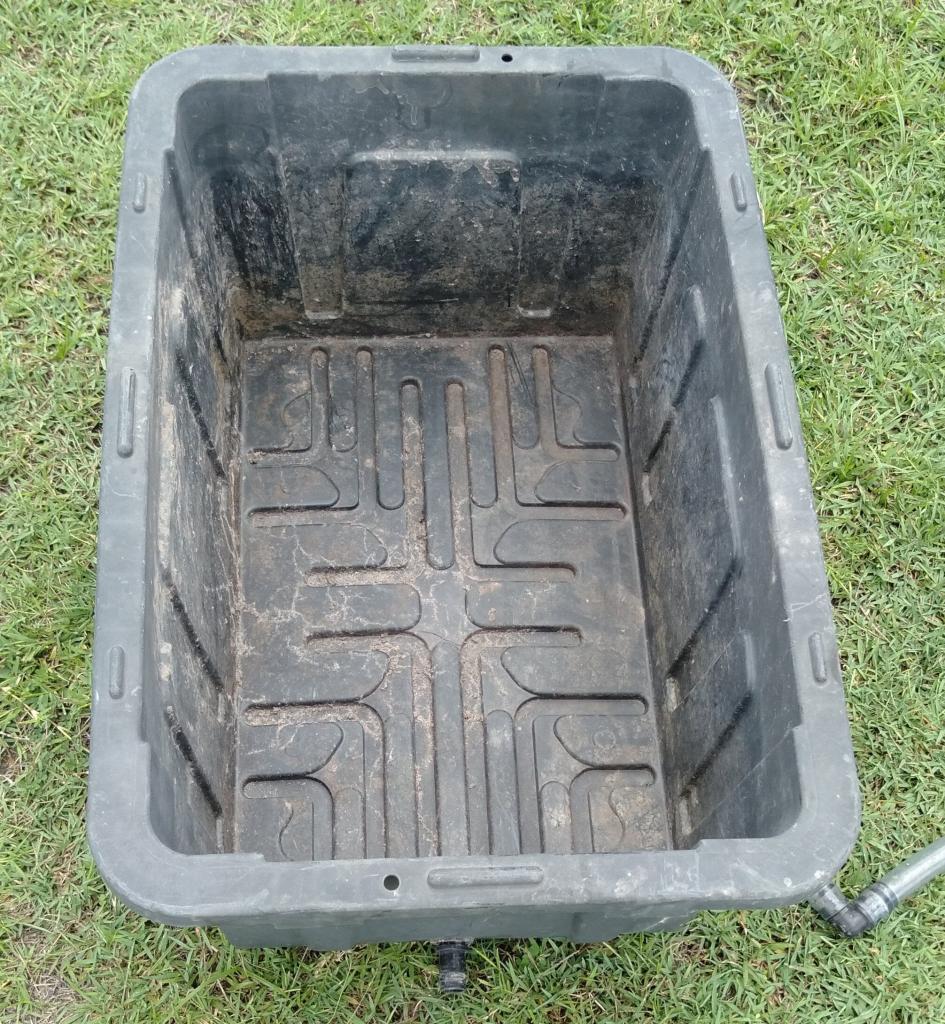
Start with a basic storage box you can buy at any hardware store. It needs to be strong enough to hold wet soil and have a way to connect a drain and filler pipe.

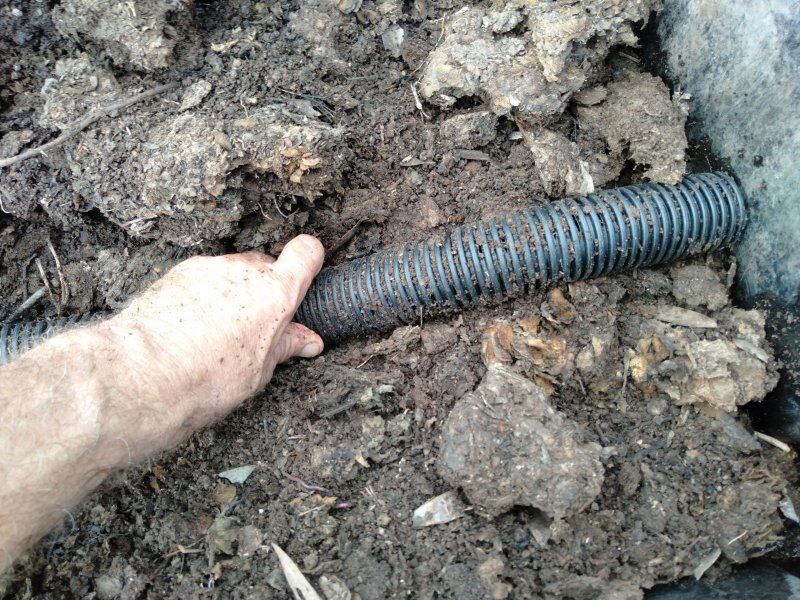
Drill a hole and install a fitting for the drain outlet. Cut a length of agricultural (Ag) pipe to run along the bottom of the box and up one side. This pipe serves two purposes:
- Acts as the fill point for water
- Distributes water evenly along the base of the box
Raise the pipe slightly just before the drain to form a “soil dam”. For a small box, a dam height of about 25 mm is enough. This sets the maximum water level in the base of the bed.
Fill the bottom half of the box with organic waste and manure. This is the food and breeding ground for soil biology.
Then fill almost to the top with a mix of local soil and well-rotted compost. This is the main root zone.
Finally, add a thin layer of fine soil on top for germination, plus a light sprinkle of rock dust (which can also help deter slugs and snails). That completes the basic growing box.
The Water Reservoir
You could run this purely by hand – pouring water into the fill tube and letting the excess drain. But most people eventually forget or get busy, so automating the system is more reliable.

Use a second box as a water reservoir. Fit it with:
- A float valve to maintain water level
- A small pump (a pond pump is fine for a single box)
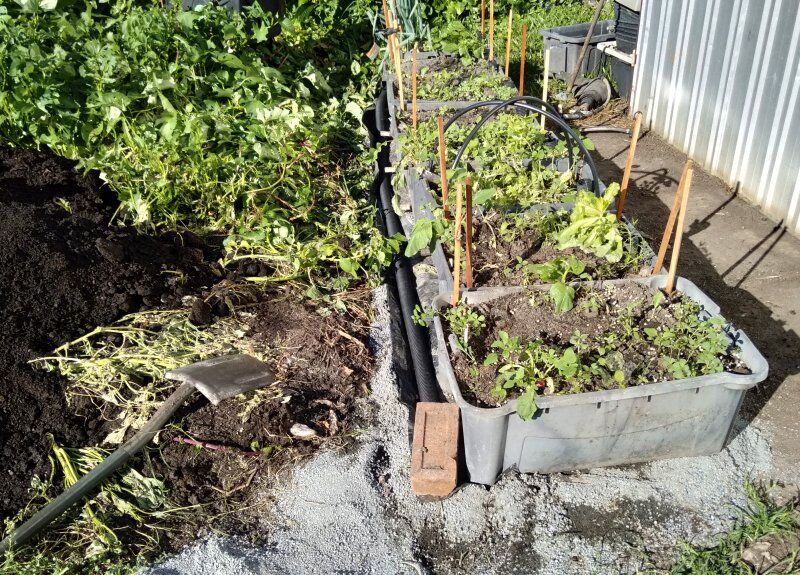
You can also connect several growing boxes in a row. For multiple boxes, use a larger pump such as a sump pump. In Colin’s garden, one sump pump feeds eight boxes plus several in-ground beds from a single in-ground sump.
Height and Layout Decisions

The top of the water reservoir must sit below the base of the growing box so water can drain back under gravity.
You have two options:
- Raise the growing box on a stand and leave the reservoir on the ground.
- Dig a hole for the reservoir and leave the growing box at ground level.
Connect the pump outlet to the filler end of the Ag pipe. When the pump runs, water flows along the pipe until it hits the soil dam, then floods the base of the box.
Water will not exit the drain until the water level reaches the top of the dam. At that point, water flows out of the drain and returns to the reservoir at roughly the same rate as the pump delivers it.
You must ensure the drain can handle the pump flow. If the flow is too high, the bed will flood and suffocate the biology you are trying to grow.

When commissioning the system, run the pump and check the drain flow. For larger setups with a sump pump, use a small irrigation nozzle or fitting (e.g. 2 mm) to restrict and balance the flows.
Partial Flood and Drain

Gbiota beds are designed for partial flood and drain. The goal is “Goldilocks moisture” – not too wet, not too dry.
You can use a cheap moisture sensor just to detect when water reaches the root zone, or you can dig a small observation hole to watch the water level rise and fall.

Check that the water level:
- Rises quickly to the dam height when the pump runs
- Flows out of the drain and returns to the reservoir
- Then falls steadily when the pump stops
The bed should not fully saturate or stay waterlogged. Stagnant water encourages “bad bugs” and putrefaction. Moving, oxygenated water supports beneficial biology.
You can also time how long it takes for water to appear at the drain. That timing is useful when setting up a pump timer.
Timer and Automation
While you can switch the pump manually, a timer makes things much easier.
- Set the runtime slightly longer than the time it takes for water to reach the drain.
- In hot, dry climates, run short pulses several times a day.
- In cooler seasons, once a day may be enough.
If mains power is not available, you can use a solar pump and control it simply by shading the panel to create one or two watering events per day.
Feeding the Bugs (and You)

Beneficial microbes, insects, and worms need food. Fortunately, they thrive on what we call “waste” – food scraps, grass clippings, prunings, and other organic material.
Good soil biology also requires a wide range of minerals. Rock dust provides these minerals and helps maintain soil structure. Read more about trace minerals here: Adapting to the food crisis.
Quarry crusher dust can improve soil texture and help deter slugs and snails when sprinkled on the surface. However, it is not formulated for trace mineral balance.

For trace minerals, I recommend Biomin – a prepared rock dust containing a broad spectrum of minerals and beneficial microbes. Sprinkle it on the surface when seeding.
I don’t sell products myself; my goal is to build a food system for future generations. I work with a company that produces Biomin to an agreed specification.

I have a similar arrangement for worm eggs, which are a critical part of Gbiota technology. Adult worms are delicate, but eggs transport well and explode into a healthy population under good conditions.
Labile Compost, Mature Compost, and Vermicast
Plants and soil organisms have evolved complex chemical defences. Young (“labile”) compost can contain compounds that inhibit growth, which is why it’s not ideal for the seed zone.
When you built your Gbiota bed, you placed labile compost in the lower layer. Over time, biology and worms break this down into stable, fertile soil, often enriched with vermicast (worm castings).
As the labile compost decomposes, the surface level may drop slightly, but what remains is excellent material for the root zone and for future seeding.
Two Ways to Use Compost as the Bed Matures
Option 1 – Minimal disturbance
Make mature compost or vermicast separately and use it as mulch over the surface when seeding. Worms will gradually distribute it through the bed.
Option 2 – Trench feeding

Dig a small trench down to the lower layer and add kitchen waste or young compost there. This is one of the best ways to recycle organic waste – soil organisms process it and build fertility.
Be mindful of:
- Soil structure – avoid digging the entire bed; disturb only small areas at a time.
- Practicality – many people use a compost bin and empty semi-mature material into trenches when seeding or transplanting.
![]()